Import Wizard
General Information
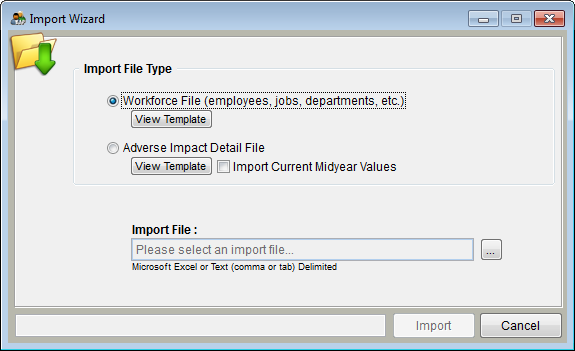
The Import Wizard allows the user to import information about current employees and personnel activities for the currently selected plan. Pro users may use a single import file to import information into multiple plans within a single company when in All Plans or with a single plan open. The Import Wizard may be accessed by clicking on the Import tool button or by selecting Import Data from the Utilities menu. All screens within The Complete AAP must be closed before using the Import Wizard.
When importing, The Complete AAP may ask you a variety of questions. These questions help the software determine what the data in your file means. Read each question the software asks you, and select the correct option for each.
Controls
Import File Types
- Workforce Information (employees, jobs, departments, etc.)
- Select this option to import current workforce information. The data should represent a snapshot of the current workforce at the beginning of the affirmative action plan year. For example, if the plan year coincides with the calendar year, import all employees employed on January 1st of the current year. Click on the View Template button to view all the importable fields of data in an Excel spreadsheet. The fields must be imported in the same order shown on the template. Columns should be left blank (not deleted) for any data that is unavailable. Workforce data will be imported into the currently selected plan or all plans if the user has The Complete AAP Pro and selects the option to import data into all plans once the import process has started, or starts the import process while working in all plans.
- If you experience difficulty while importing a workforce file containing more than 16,000 lines you may wish to split the file.
- Example of a blank Workforce Template
- Example of a blank Workforce Template
- Adverse Impact Detail File
- Adverse Impact Detail File
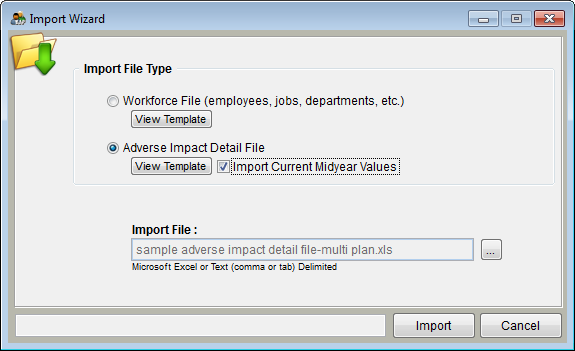
- Select this option to import personnel activity and workforce information used in the adverse impact analysis. The applicant, hire, promotion, and termination activity for the last 12 months should be analyzed at a minimum. The Base Group totals should represent a snapshot of the workforce as it existed 12 months ago. The Detail import file contains a separate row of data for each individual. For example, if there were 500 applicants during the previous 12 months, the file should contain 500 applicant records. Click on the View Template button to view all the importable fields of data in an Excel spreadsheet. The fields must be imported in the same order shown on the template. The first four columns must contain data. Adverse impact data will be imported into the currently selected plan or all plans if the user has The Complete AAP Pro and selects the option to import data into all plans once the import process has started, or starts the import process while working in all plans. Multiple imports into adverse impact will add the numbers you are importing to the numbers that already exist in the plan.
- Select this option to import personnel activity and workforce information used in the adverse impact analysis. The applicant, hire, promotion, and termination activity for the last 12 months should be analyzed at a minimum. The Base Group totals should represent a snapshot of the workforce as it existed 12 months ago. The Detail import file contains a separate row of data for each individual. For example, if there were 500 applicants during the previous 12 months, the file should contain 500 applicant records. Click on the View Template button to view all the importable fields of data in an Excel spreadsheet. The fields must be imported in the same order shown on the template. The first four columns must contain data. Adverse impact data will be imported into the currently selected plan or all plans if the user has The Complete AAP Pro and selects the option to import data into all plans once the import process has started, or starts the import process while working in all plans. Multiple imports into adverse impact will add the numbers you are importing to the numbers that already exist in the plan.
- Example of a blank Adverse Impact Template
- Import Current Midyear Values Box
- Import Current Midyear Values Box
- Click this box to import data for a different date range. This option is typically used to import personnel activity data that has occurred since the beginning of the current plan year. OFCCP requires the submission of this data if the contractor is at least 6 months into the current plan year at the time the contractor receives notice of a Compliance Review.
Import File - Enter the complete path and name of the import file if you have renamed and/or saved the file outside of the Import folder within the plan. Click on the ![]() button to search for the import file.
button to search for the import file.
Import Button - This begins the import process with the options selected.
Cancel Button - Closes the import window without importing any data.
See Also
Required Fields - Workforce Import
Required Fields - Adverse Impact
© Copyright Yocom & McKee, Inc.


